Diy Rolling Clamp Rack : Ultimate Mobile Clamp Rack 18 Steps With Pictures Instructables / Pipe clamps are heavy and cumbersome, which makes them difficult to store, but in a couple hours you can build this simple rack that will keep your clamps off the floor and within easy reach.
Diy Rolling Clamp Rack : Ultimate Mobile Clamp Rack 18 Steps With Pictures Instructables / Pipe clamps are heavy and cumbersome, which makes them difficult to store, but in a couple hours you can build this simple rack that will keep your clamps off the floor and within easy reach.. How to build a clamp rack a reader designed an angled, rolling clamp rack that is made from construction lumber, threaded rod, pvc pipe, and lag screws. It has to store the items from the wall out instead of jay, i am totally stealing, er, borrowing this idea for my rolling clamp cart. I had to make a huge clamp rack to house all my clamps. Pipe clamps are heavy and cumbersome, which makes them difficult to store, but in a couple hours you can build this simple rack that will keep your clamps off the floor and within easy reach. We have featured different diy tutorials to explain how to.
Rather than building out a bunch of wall mounted pieces, i decided to put most of it into one big cart that i could move to what i was working on. Norm's got a work table and rolling clamp rack to show us this time. Learn to build this great shop project a reader designed an angled, rolling clamp rack that is made from construction lumber, threaded rod, pvc pipe, and lag screws. Take a look at your clamps and what you are likely to get in the near future the clamp rack is essentially a box with 2 heavy uprights and a couple of heavy shelves. I marked the center of the 4 in.
Diy Pipe Clamp Rack Easy Clamp Rack Using Scrap Wood from www.woodshopdiaries.com Instead, i present this clamp rack design: The diy experts at hgtv show you how to use your diy skills to build the ultimate rolling garage storage shelves. Used to store long pieces of metal offcuts. We hope this pictures will give you some good ideas for your project, you can see another items of this gallery. Take a quick outlook of diy rolling garment rack shared by ben uyeda that is fantastic easy to build furniture for homes. I used both wood glue and some screws to secure these to the sides of the frame. My wife needed a simple, pretty, diy clothing rack for her women's clothing boutique; How to build an affordable clothing rack with piping.
I had to make a huge clamp rack to house all my clamps.
It works great and is. We have featured different diy tutorials to explain how to. Here's how we built one. Learn to build this great shop project a reader designed an angled, rolling clamp rack that is made from construction lumber, threaded rod, pvc pipe, and lag screws. Then allow it to completely dry overnight before doing the final steps. I drove three of them evenly space through the back and into here are a few shots of the finished clamp rack. By diy montrealapril 8, 2020shop projectsclamp rack, clamp storage, parallel clamp rack, universal clamp, woodworking clamps. I had to make a huge clamp rack to house all my clamps. My wife needed a simple, pretty, diy clothing rack for her women's clothing boutique; The spacing between the upper and lower slots on the sides. Will go great with my pallet coffee table i'm making! How to build a clamp rack a reader designed an angled, rolling clamp rack that is made from construction lumber, threaded rod, pvc pipe, and lag screws. I made this diy quick clamp rack for my shop super fast when i needed a place to put my clamps.
Space saving bar clamp rack. The spacing between the upper and lower slots on the sides. The video is literally just a minute and a half. It works great and is. Use a clamp to place a scrap piece of plywood right against the centerline.
Shop Savvy Clamp Racks Woodworking Plans Diy Wood Shop Clamp Storage from i.pinimg.com Learn to build this great shop project a reader designed an angled, rolling clamp rack that is made from construction lumber, threaded rod, pvc pipe, and lag screws. Eventually your collection grows and you end up with clamps all over. The spacing between the upper and lower slots on the sides. Will go great with my pallet coffee table i'm making! It works great and is. It has to store the items from the wall out instead of jay, i am totally stealing, er, borrowing this idea for my rolling clamp cart. One sheet of plywood makes an easy woodworking project in the form of a pretty handy rolling clamp cart in a small footprint.read more, with links to the. Here's how we built one.
Diy is all the rage these days, and due to the countless online sources, it becomes difficult to find reliable sources.
It works great and is. By april wilkerson on august 09, 2015. Homemade rolling storage rack constructed from angle iron, tubing, and casters. It has to store the items from the wall out instead of jay, i am totally stealing, er, borrowing this idea for my rolling clamp cart. When you've got so many clamps that it's a problem getting them to where the work is being done, build this rolling clamp rack! I used both wood glue and some screws to secure these to the sides of the frame. I wanted quick access to all of my clamps (a lot of them) and stuff like glue, screwdrivers, pliers, etc. Norm's got a work table and rolling clamp rack to show us this time. Here's how we built one. They were just laying all over the floor and i could have that. I am going to make plans for this lumber rack (should be done this evening) so if you would like my material list and dimensions, they will be available in the plans. One sheet of plywood makes an easy woodworking project in the form of a pretty handy rolling clamp cart in a small footprint.read more, with links to the. It holds about 50 clamps, takes up a little more than four square feet of floor space and can honestly be built in an afternoon.
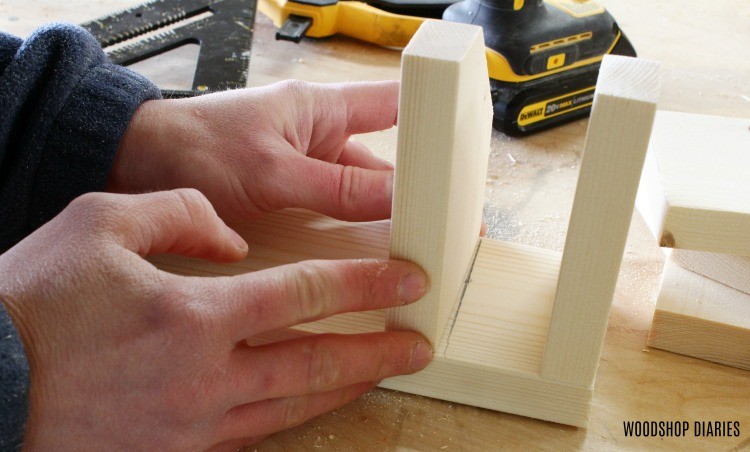
Use a clamp to place a scrap piece of plywood right against the centerline. I attached the clamp rack with timber lock screws that i bought from the home store. Pieces of plywood and then drilled a ⅝ in. January 15, 2020 by shara, woodshop diaries. I made this diy quick clamp rack for my shop super fast when i needed a place to put my clamps.
Wood Clamp Rack Plans Easy Diy Woodworking Projects Step By Step How To Build Wood Work from blog-imgs-59-origin.fc2.com When you've got so many clamps that it's a problem getting them to where the work is being done, build this rolling clamp rack! Rolling garment rack made from copper piping. Diy is all the rage these days, and due to the countless online sources, it becomes difficult to find reliable sources. I am glad that this is finally done and i realize that it wont be long until i probably have to build another one!! I drove three of them evenly space through the back and into here are a few shots of the finished clamp rack. I had to make a huge clamp rack to house all my clamps. It works great and is. First, determine your clamp rack measurements.
Rolling garment rack made from copper piping.
This is perfect for my living room! They were just laying all over the floor and i could have that. By diy montrealapril 8, 2020shop projectsclamp rack, clamp storage, parallel clamp rack, universal clamp, woodworking clamps. Then i clamped them in place and attached them with screws. The video is literally just a minute and a half. Diy is all the rage these days, and due to the countless online sources, it becomes difficult to find reliable sources. This rolling clamp rack holds about 50 clamps, takes up around four square feet and can be built in an afternoon. January 15, 2020 by shara, woodshop diaries. Then allow it to completely dry overnight before doing the final steps. We hope this pictures will give you some good ideas for your project, you can see another items of this gallery. I clamped the pieces of plywood together and then sanded the edges with my orbital sander. Here's how we built one. I am glad that this is finally done and i realize that it wont be long until i probably have to build another one!!


0 Comments